Saturday, April 12, 2025

Healthy gluten free, refined-sugar-free chocolate cake so good it can't be real!

 I've been trying to eliminate refined sugar products from my baking, on the very rare occasions these days when I have time to bake. Working with no childcare while raising a one year old, ten year old, and thirteen year old, managing their extracurricular activities (hello club soccer, tennis, piano, guitar, ski racing, basketball AND Lego robotics?!) AND trying to manage a home renovation and maintain a baseline level of cleanliness and family cohesion is EXHAUSTING. Sitting down to write this entry feels like the ultimate luxury. However, I needed to record this recipe for posterity, because it is SO good. The scant piece left in the huge pan after less than 12 hours is testament to this. 

Astute readers will recognize the basics of this recipe from a previous posting... however I've changed so much of the recipe that a re-write is necessary.

So without further ado..... the world's best after-school, before-breakfast, just-trying-to-keep-the-sanity-levels-in-check-around-here! chocolate cake:


Whole grain Chocolate Fudge Cake
adapted from King Arthur Flour

You can use coconut yogurt (I like unsweetened Cocojune brand) and chia seeds as an egg substitute to make this vegan.

  • 1/2 cup Dutch processed cocoa
  • 1 cup hot water
  • 1/2 cup extra-virgin olive oil
  • 1 cup maple syrup
  • 1 cup unsweetened applesauce
  • 120 grams teff flour
  • 120 grams white rice flour
  • 2 tsp psyllium husk 
  • 1 teaspoon baking soda
  • 1/2 teaspoon baking powder
  • 1/2 teaspoon salt
  • 1/2 cup European style maple yogurt** or buttermilk
  • 2 large eggs, or 2 tablespoons chia seeds soaked in 6 tablespoons cold water
  • 1 teaspoon vanilla
  • good quality chocolate chips (Guittard or Ghiradelli brand) (optional)


Preheat oven to 350 and grease a 10 x 8, or 9 x 13 pan. (I have been using a metal 10 x 14 roasting dish with great success.)

Put cocoa in a small mixing bowl and pour boiling hot water over it, whisking until smooth. Add in oil and maple syrup and whisk together.

In a large bowl whisk together all the dry ingredients. Pour the cocoa mixture over and stir until combined. Add the eggs (or chia mixture), the applesauce, the yogurt or buttermilk, and the vanilla and stir until smooth.

Pour into prepared pan and bake just until a toothpick comes out with with moist crumbs. This took about a half hour for me, but as always, bake time will depend on the baking vessel, the weather, the altitude and your oven. Do not overbake!!

Once out of the oven sprinkle chocolate chips on top of the hot cake - wait 5 minutes till they melt - then spread with a spatula. World's best and easiest frosting! 

Eat with your babies and don't feel guilty.

 **for yogurt, this is what I useTrader Joe's also makes a good one; if you are using thick yogurt thin it with milk before measuring

Thursday, September 9, 2021

Secret Brownies


I was going to title these "almond butter brownies" but felt it would be a figurative - if not literal - misnomer. These babies are indeed almost entirely made out of almond butter, hence the literal accuracy, but they do not taste a thing like almond butter. (Which - I think everyone will universally agree - is a good thing. Almond butter does not get people going like peanut butter does.)

Not only are these gluten-free and dairy-free, they are also refined sugar-free, being sweetened entirely by maple syrup. I owe this recipe to a wonderful cookbook called "Sweet Laurel," which specializes in gluten-free, dairy-free, and refined-sugar-free baking. When a devoted baker finds out she has Hashimoto's disease, she finds a work-around! Thanks Laurel for the wonderful recipe.

These babies are so fudgy, delicious and intensely chocolately, no one will know your secret. These keep very well in the freezer and taste good at all temperature ranges. (In the name of research, I've taste-tested them from straight out of the oven to solidly frozen, and everywhere in between! You're welcome.) 


Secret Brownies

from the Sweet Laurel Cookbook by Laurel Gallucci & Claire Thomas

Technically, to make these 100% refined sugar free you need to make your own chocolate chips using maple syrup. I could not be bothered to do this, but if there's another quarantine I will try it out and report back. Also, the original recipe calls for cacao powder instead of cocoa powder. The difference is only in how the cacao beans are roasted. Cacao powder is more bitter but has a higher nutritional value. So use unsweetened cacao powder if you want to feel extra good about eating these treats.

2 cups (500 g) almond butter

2 large eggs

1 1/4 cups maple syrup

1 tablespoon vanilla extract

1/2 cup (48 g) unsweetened cocoa powder

1 teaspoon baking soda

1/2 teaspoon pink salt

1 cup (170 g) chocolate chips


Line an 8 x 8 baking square with parchment paper. Preheat the oven to 350.

Whisk together the cocoa powder, baking soda and salt in a small bowl. Set aside.

Mix the almond butter in a stand mixer with the paddle attachment on medium speed until it is completely smooth, then mix in the eggs, one at a time incorporating well after each addition. Then mix in the maple syrup and vanilla. Finally add in the cocoa powder mixture and mix until smooth. Stir in 3/4 cup of the chocolate chips and pour into prepared baking pan. Sprinkle the rest of the chocolate chips on the top and bake for about 30-35 minutes, or until the brownies are just set around the edges of the pan. As always, don't overbake!  


Thursday, April 22, 2021

Banana Rum Cakes with Caramel Sauce, gluten free, plus how to turn a recipe into a GF one!

I was going to use this delectable banana cake recipe to talk to you about how I clearly have an obsession with baking rotten bananas into yummy treats (see here, and here!) but I realized that I haven't yet done a post where I really dig into substituting gluten free flours for all-purpose flour, and this recipe is a classic example of how easy it is to switch to gluten free in your baking.

When I first discovered my serious health issues with gluten, I started baking gluten-free as most people do: I bought pre-mixed gluten-free blends at the store. There is nothing wrong with pre-mixed blends. In fact, when I'm feeling lazy I have three different King Arthur GF blends that I reliably and successfully turn to. However, as I got used to eating gluten-free I realized that the guar gum and xantham gum found in store-bought blends cause some of the same digestional issues I had from eating gluten. Those gums had to go! Only problem was, those gums are there for a reason. They help hold up the baked goods in the same way gluten does, by providing structure. Luckily there's a binder that is a good alternative to xantham gum: psyllium husk. You need to use 4x as much psyllium husk as xantham gum in a recipe (use 1 tsp psyllium husk per cup of flour called for), but other than that, it does just as good a job, plus it has the added benefit of being a natural fiber source. 

So if you too have decided you need to try to make your own gluten-free blends instead of relying on the pre-mixed ones, the one thing you MUST have is a scale. You absolutely CANNOT expect to turn a gluten-recipe into a GF one without a scale (unless you are using a store-bought cup-to-cup blend.) In general baking terms, weighted ingredients are much more accurate, and will give you tasty results each time. Measuring by volume with cups is not only less accurate it is also more time-consuming. Once you get used to it, you will never go back. Additionally, measuring with a scale is even more important for GF baking because the best way to replace all-purpose flour in a recipe is to replace it with the same WEIGHT of alternate GF flours. So if a recipe calls for 1 cup of all-purpose flour, you can just get out your scale and spoon in a few spoonfuls of a whole bunch of different gluten-free flours until you get to 120 grams and that (plus 1 tsp of psyllium husk) will be your substitute. 

Now which flours work best for what? In general terms, white rice flour, almond flour and sourghum flour are the best GF flours to substitute for all-purpose flour. If a recipe calls for cake flour I use a mix of white rice flour, sourghum flour, tapioca flour, and cornstarch. If a recipe calls for bread flour I use brown rice flour, sourghum flour, potato starch*, and tapioca flour. When making pancakes and muffins (the easiest things to make gluten-free!) I like to experiment with different blends but love using brown rice flour or almond flour as the main flour with smaller proportions of buckwheat flour and/or millet flour (both are flours made from seeds.) There are some flours that really mess with a recipe because they absorb too much liquid. Coconut flour and potato flour* are ones that do this and I would not try to use either of these flours when replacing all-purpose flour in a recipe. Other flours like quinoa flour, teff flour, pistachio flour and hazelnut flour, have very strong flavor profiles so you should also proceed with caution there. Teff flour and buckwheat flour both pair well with chocolate but generally should not be used as the only flour when substituting for all-purpose flour. When baking a cake that gets most of its structure from beaten egg whites or beaten whole eggs, such as angel food cake, chiffon cake, genoise cake, or really any cake at all that involves you folding egg whites into the batter, or beating whole eggs for a very long time (sometimes a chiffon or genoise cake recipe is not labeled as the type of cake it is), you should NOT use psyllium husk in those recipes, and white rice flour by itself is the best substitute. 

I hope that was a good introduction to flour substitution for those of you adventuring into the promising and tasty world of gluten-free baking! I packed a lot of information into just a three paragraphs so if you have any questions or need clarification leave a comment and I will see if I have an answer for you. All in all, making a recipe gluten-free is super easy. Especially when you are making a butter-cake based recipe like the one below, that is chock full of sweetness and flavor, no one will know that it is gluten free. Of course, as in gluten baking, it helps to have a good understanding of basic baking techniques, to have an accurate, well-performing oven,** and to not ever, ever over bake! 


*Potato starch and potato flour are two totally different flours with completely different properties, they are not replaceable for each other and should not be confused with each other.

** If your oven is on the older side, I highly recommend buying an oven thermometer so that you know exactly what temperature your oven actually is. It can often be 100 degrees or more off of what the dial says!


Gluten Free Banana Rum Cakes with Caramel Sauce

adapted very slightly from Sweet by Yotam Ottolenghi and Helen Goh

If you don't need these to be gluten free then simply substitute 110 g of all-purpose flour for the white rice, sorghum and psyllium husk. But I promise you, these babies are perfection and no gluten-eater would be able to tell these apart from a gluten-filled one. 

Sugar work can be tricky but the caramel sauce is TOTALLY worth the minimal extra effort. Just read the instructions very carefully twice over before even thinking of starting the sauce if you've never made caramel before. 

All ingredients should be at room temperature, but it is particularly important for the butter to be poke-a-hole-through-with-your-finger soft. 

I used a mini bundt pan that made six small bundt cakelets. Each cake was enough for two people so next time I will use my extra-mini bundt pan that makes twelve small bundt cakelets. Use whatever muffin or small cake pan you have but make sure you adjust the baking time accordingly and do not overbake. 

Ingredients:

100 g unsalted butter, at room temperature

70 g granulated sugar

70 g brown sugar

2 large eggs

1 tsp vanilla

100 g almond flour

1/8 tsp salt 

1/2 tsp cinnamon

3/4 tsp baking soda

1 1/2 tsp baking powder

1 tsp psyllium husk

60 g white rice flour

50 g sourghum flour

230 g peeled, mashed, overripe bananas (from about 3 smaller bananas)

100 g sour cream 

2 tbsp dark rum


For Rum Caramel Sauce:

200 g granulated sugar

1/2 cup (120 ml) water

1/2 cup plus 2 tsp (130 ml) heavy cream

1 1/2 tbsp dark rum


Generously grease your mini bundt pan or muffin pan with butter and preheat the oven to 350 with a rack in the middle of the oven.

In a stand mixer fitted with the paddle attachemnt, beat the butter and both sugars for about 3 minutes, until pale and fluffy. Beat in the eggs, one at a time and mixing well after each addition. Stir in the vanilla. 

In a small bowl combine the bananas, sour cream and rum.

In a large bowl measure out and then whisk together all the dry ingredients until very well combined (about 2 minutes of thorough whisking.) 

Add the sour cream and flour mixtures in three alternate additions to the butter mixture, mixing until thoroughly combined after each addition.

Spoon the batter into the prepared pans, until each is 3/4 full. Bake for anywhere from 12-28 mins (depending on the size of the pans you used), until the tops spring back lightly when touched with your fingertip or a toothpick inserted into the center of a cakelet comes out clean. Set the cakes aside to cool completely before taking them out of the pans.

Caramel:

While the cakes are baking make the caramel. Stir the sugar and water together in a medium sized saucepan (the size of the pan is important.) Put the pan on the burner and turn the heat to medium-high. Do not stir or touch the syrup once you turn on the heat. You can tilt the pan to swirl around the sugar but do not stir. Bring the mixture to a boil and simmer for 8-10 minutes, or until the syrup turns a deep amber color. Immediately remove the pan from the heat when it turns this magically color. Stir in the rum, and then very, very slowly stir in the heavy cream bit by bit. Set the caramel aside for 30 minutes before pouring over the cakelets. 

Sunday, March 7, 2021

Coconut Chiffon Cake


It's March in northern Vermont, which means that it's still cold as hell, there is snow and ice everywhere... and I am dreaming of escaping to a tropical paradise. Which of course, will remain a dream, as getting to a tropical paradise during a global pandemic is not easy. 

What is easy is baking this cake which will make you FEEL like you are on a tropical island. Light, airy, just the right amount of sweet, and just the slightest hint of coconut... pair it with a frozen rum drink of your choice, close your eyes, and trust me, you will BE in a tropical paradise. 

You're welcome.


Coconut Chiffon Cake (Gluten and Dairy Free)

adapted from "Gluten-Free Flavor Flours" by Alice Medrich

The cookbook I took this from has been a treasure trove of gluten-free goodness for me. I highly recommend anyone who wants to bake gluten-free to buy it! Alice Medrich is a world-class pastry chef and every recipe in this book is wonderful. When I'm substituting gluten-free flours for all-purpose flour in another cake cookbook, I usually refer to Alice's recipes in "Gluten-Free Flavor Flours" first to see if my flour choice, and ingredient ratios, are correct. 

Also I purposeful did not give volume measurements here. If you don't have one, go buy a $15 electric scale at your local kitchen store, it will make your baking SO much accurate, and ergo SO much better. You're welcome.

140 g sugar

2 large egg yolks, at room temperature

3/8 cup coconut water* or light/low-fat Asian coconut milk

1/4 cup vegetable oil

1 tsp vanilla

35 g unsweetened dried shredded coconut

100 g white rice flour

1 1/2 tsp baking powder

1/4 tsp salt

4 large egg whites, at room temperature

1/4 tsp cream of tartar


Line an 8x3 or 9x2** cake pan with parchment or a silicone cake liner. Do not grease the sides of the pan! Preheat the oven to 325.

Weigh the sugar out in a large mixing bowl and then take out two tablespoons' worth and set aside (to use later when whipping the egg whites.) Add in the egg yolks, coconut water or milk, vegetable oil, vanilla, dried coconut, rice flour, baking powder and salt. Whisk together until thoroughly combined.

In a standing mixer fitted with the whisk attachment, whisk the egg whites and cream of tartar on medium-high speed until very soft peaks form when you lift the whisk. Slowly add in the reserved 2 tablespoons of sugar, and beat until the whites are very stiff, but not dry. If you don't know what dry beaten egg whites look like then aim for under-beating them, then take the bowl and hold it over your head. You know they've been beaten enough if they stay completely in place (and don't fall on your head)!*** 

Fold 1/4 of the beaten egg whites into the yolk mixture until thoroughly incorporated. Then gently fold in the rest of the egg whites, folding until just combined. Scrap mixture into prepared pan and bake in the center of the oven. If using an 8x3 pan bake for 40-45 minutes at 300, if using a 9x2 pan bake for 28-33 minutes at 325, or until a toothpick inserted into the center comes out clean, or the top springs back just slightly when pressed with your fingertip. 

Let the cake cool completely in the pan, then use a knife to loosen the cake from the edges of the pan, then invert onto a cake platter and peel off the parchment or silicone liner. Enjoy plain, or with a splash of rum. Or Alice suggests it goes splendidly with grilled pineapple slices. 


*use a brand like Goya that has a real punchy coconut flavor

** I had much more success using an 8x3, but if you don't have that size a 9x2 will be fine.

*** This is a trick I've seen bakers do on the Great British Baking Show. I've whipped so many egg whites in my life that I don't need to do this, but I still do it anyway because it's fun!

Wednesday, November 11, 2020

Marscapone Pumpkin Cheesecake with Pumpkin Seed Brittle (gluten-free!)


Thanksgiving is going to be a lot different this year for most of us. If you are planning a dinner that is much smaller in attendance than normal, this pumpkin cheesecake would be a perfect dessert. Not that it's small in size or lower on decadence (to the contrary, it will feed at least a dozen people and is lusciously rich!)... but even if you are hosting a thanksgiving of just 2 people, this dessert will last in your frig for weeks, and be just as tasty as the week you made it. Make it for Thanksgiving, enjoy until Christmas.... now THAT is a Covid silver lining! 


This is not a Cheesecake Factory cake. Those sicky sweet, clangy disasters of dessert are what give cheesecake such a bad rap. This cheesecake is silky smooth and heavenly. Don't forgo the marscapone nor the bain marie for baking it. Both add to its luscious, smooth, divine texture. Marscapone lasts for months unopened in the frig, so I always pick some up when I'm in a store that has it. When I get home I tuck it in the back of my frig for those unrelenting dreary winter days when your spirit needs a pick-me-up. A good cheesecake never fails to please - whether it's a big event like Thanksgiving or just another dreary November Tuesday.


Marscapone Pumpkin Cheesecake

adapted from Bon Appetit


  • 9 ounces gluten-free graham crackers or gingersnaps or a combination
  • 6 tablespoons melted unsalted butter
  • 1 15-ounce can pumpkin purée
  • 4 large eggs, room temperature
  • 3 large egg yolks, room temperature
  • 1¼ cups light brown sugar
  • 1 tsp cinnamon
  • 1 tsp ground ginger 
  • 1/2 tsp ground cloves
  • 1/4 tsp freshly grated nutmeg
  • ½ tsp kosher salt
  • 1 tsp vanilla extract
  • 24 ounces cream cheese, room temperature
  • 8 ounces marscapone, room temperature
  • 1 cup pumpkin seeds (pepitas)
  • 3 tablespoons maple syrup
  • 1/2 tsp salt


Preheat the oven to 350. Pulse graham crackers/gingersnaps in food processor until it is all crumbs. Pour in the melted butter and process again until the texture resembles wet sand - about 1 minute more. Put mixture into a 9-inch springform pan and press it down evenly across the bottom of the pan. Bake for about 10 minutes. Set the pan aside to allow the crust to cool completely before filling and baking. Crust can be made the day before.

Start the pumpkin seed brittle while the crust bakes. Mix the pepitas, maple syrup, and salt in a small bowl. Spread out onto a silicone baking mat placed on top of a baking sheet and bake for 15-20 minutes at 350 until the syrup is bubbling and the color is a golden brown. Set aside to let cool completely.

Heat up a full tea kettle of water (for the bain marie used for baking the cheesecake). Wipe out the food processor to use it again to mix the filling. Process the eggs, egg yolks, pumpkin puree, sugar, spices, vanilla and salt until very smooth. Add the cream cheese and marscapone and process until completely smooth and the cream cheese has all been incorporated, about 2 minutes. 

Put a clean kitchen towel in the bottom of large roasting pan. Wrap the outside of the crust pan with aluminum foil and place on top of the towel in the pan. Pour the filling into the pan. Place roasting pan in the oven and then fill the roasting pan with boiling water until the water comes halfway up the springform pan. (The foil is so that if your springform pan is not water-tight that no water comes in contact with the cheesecake.) Bake until the edges are set and the center is still wobbly, about 1 1/2 hours. Remove from the bain marie and let cool at room temperature for 2 hours. Refrigerate for at least 3 hours. Can be made several days in advance. 

Break up the pumpkin seed brittle and use it to decorate. Either line the edges of the cake with large pieces or pile it up artfully atop the cake. (In my photos I did both and the effect was not as elegant as one or the other!) You will have extra brittle, serve it alongside.

Thursday, November 5, 2020

Guy Fawkes Day Gingerbread Cake, Gluten Free

 As the former American colonies of the British Empire are mired today in sluggish presidential election results amidst a backdrop of grotesquely partisan national discord, perhaps we in the USA could take a break by looking more closely at the celebrations of our former colonizers. Today is Guy Fawkes Day in the United Kingdom. What's this holiday you say? Precisely. It involves celebrating the failure of a plot by Catholics to blow up the House of Lords, kill the king and reinstate the Roman Catholic church in 1605. Guy Fawkes was one of the conspirators who was captured, gave away the plot after two days of torture, and then was sentenced to be drawn and quartered. Today this holiday is celebrated with lots of bonfires and fireworks, symbolic of the gunpowder that was to be used in the attack. Straw effigies of Guy Fawkes are burned. On the whole it seems like a rather barbaric holiday.* 

The total weirdness of the origins of this holiday aside, I for one am all for a cozy bonfire and some fireworks on an otherwise dreary, dark November evening. Throw in the prospect of some English cider, Scottish whisky, and homemade gingerbread and I would even burn a straw effigy to join in. Having lived through two London Novembers I can say that every person on that island reaaaaally needs this holiday to get through this month when the sun never shines.  Especially this year. I hope my English friends that you find a way to get your bonfires and camaraderie while in lockdown. And if you can't... well try my gluten-free gingerbread. It's delicious. Hugs from across the Atlantic. 


Guy Fawkes Day Gingerbread

I found this recipe in my all-time most useful and trustworthy cookbook, the 2006 edition of the cannon of American cookery, The Joy of Cooking. It is listed as "Guy Fawkes Day Cake" but the note says it is also called "parkin" and that it is a classic of northern England. It is delicious served warm from the oven with freshly whipped cream. If you do not need a gluten-free cake simply substitute 1 cup all-purpose (plain) flour for the buckwheat, brown rice flour, and psyllium husk. If you are using all-purpose flour make sure you mix only until the dry ingredients are moistened and not any longer so you don't end up with a tough cake due to overworked gluten (a problem that gluten-free cake bakers do not have!)


1/2 cup (1 stick) unsalted butter

2/3 molasses (or black treacle)

2/3 cup old-fashioned rolled oats

60 grams buckwheat flour

60 grams brown rice flour

1 tsp psyllium husk

1 tbsp sugar

1 tsp ginger

1/4 tsp cloves

1/2 tsp salt

1/2 tsp baking soda

1 tsp lemon zest (from 1 large lemon)

2/3 cup whole milk (room temperature)


Preheat the oven to 350. Grease an 8-inch square or round cake pan. 

In a small saucepan melt over low heat the molasses and the butter and stir together. Remove from the heat when melted.

In a large bowl whisk together all the remaining ingredients except the milk. Stir in half the melted butter mixture, then half the milk, then the remaining butter mixture and milk. 

Pour batter into prepared cake pan and bake in the middle of the oven for about 25 minutes, until the cake starts to pull away from the sides of the pan and a toothpick inserted in the center comes away clean. Do not overbake! Let the cake cool in the pan set atop a cooling rack.


* However as a citizen of a nation that built its wealth and power upon the backs of millions of enslaved Africans and has neither apologized to nor compensated the descendants of said enslaved, I don't think I can fairly judge another nation's barbarism.


Tuesday, July 7, 2020

Pineapple Duo - Pineapple Ice Cream and No-Cook Pineapple Syrup

While everyone else was perfecting sourdough bread during quarantine, I was experimenting with cheesecakes and ice cream. What can I say? Social isolation is no time for low-fat cooking.

While many ice cream makers come with recipes for ice cream that involve no cooking, a true ice cream base is technically a custard, thickened with either eggs or cornstarch, or sometimes with both, as in the fabulous pineapple ice cream recipe I'm sharing with you below.

This ice cream is truly divine, and it is not too hard to make. Make sure you have all your equipment and ingredients measured and ready before you begin, and read about making custards if you haven't made one before.

The pineapple syrup recipe that follows the ice cream one is SO unbelievably simple and satisfying. Who knew that pineapple cores could be so indispensable? The task of cutting up a whole pineapple will now forever be linked in my mind with snazzy, fresh, delicious pineapple drinks. The next round of quarantine (in the fall or winter, you know it's coming!) is going to be full of fun pineapple cocktails.


Pineapple Ice Cream

from Serious Eats

Save the pineapple core and the juiced lemon to make the super easy no cook pineapple syrup that follows. 

Make sure that you use only 2 or 3 drops of the vanilla, no more, or else the vanilla flavor takes over the subtle flavor of the pineapple. 
Read the instructions thoroughly before you begin. 

170 g sugar (about 1 cup minus 2 tbsp)
20 g cornstarch (about 3 tbsp)
1/4 tsp (1g) kosher or sea salt
2 large eggs
285 g fresh pineapple purée (about 1 1/4 cups)
2 oz fresh lemon juice (about 1/4 cup; 55g)
8 oz heavy cream (about 1 cup; 225g), straight from the fridge
1/2 to 1 ounce light rum (about 1 to 2 tablespoons; 15 to 30g), optional
2 or 3 drops vanilla extract

In a 3 quart stainless steel saucier whisk together the sugar, cornstarch, salt, eggs, lemon juice and pineapple purée. Put the pan on medium-low heat and heat until just warm to the touch, whisking constantly, about 3 minutes. Then increase the heat to medium, and keep whisking until the custard is thick enough to coat a spoon, about 2 minutes longer. When the custard begins to bubble continue whisking FOR EXACTLY 30 SECONDS (this neutralizes a starch-dissolving enzyme in the egg yolks) and immediately take off the heat and pour through a fine-mesh sieve into a stainless-steel or glass bowl. Cover and refrigerate until cool, then pour into your ice cream machine and churn until the ice cream is thick and light. Store in an air-tight container in the freezer for about 4 hours, or until firm enough to scoop.


No Cook Pineapple Syrup
adapted from Serious Eats

1 diced pineapple core, and pips from 1 large pineapple
1 or 2 already-juiced lemons or limes
1 cup sugar or brown sugar

The above measurements are approximate, no need to be precise about this one!
Toss everything together in a large glass, ceramic or stainless steel bowl. Cover and let stand at room temperature. Stir every half hour or so until sugar has completely dissolved, about 4 hours. Then strain the mixture through a fine-mesh strainer into a glass jar. Use your syrup immediately or refrigerate for up to 3 months.

Tuesday, May 19, 2020

Buckwheat Buttermilk Gluten Free Pancakes

My dad loves taking his kids, and now his grandkids, out to breakfast at diners. Some of my fondest memories with him have been made after grumpily getting dressed at an hour I'd rather still be sleeping and stumbling into whatever dive diner is closest. There's just something special about breakfast.

I've always been partial to pancakes for breakfast, preferably of the chocolate chip variety served with a dollop of slightly melting whipped cream. But since discovering my severe gluten-intolerance diner pancakes have not been an option. Luckily, I also love to make pancakes at home. (I have a grand total of SEVEN pancake recipes on this blog already! None of them are written as gluten free. However if you want to adjust them to be gluten free, most gluten free flours and flour blends adapt extraordinarily well to pancake recipes.)

I made a regular batch of my GF pancakes this morning, but I made a few adjustments that I haven't tried in a while and they turned out SPECTACULARLY! So good in fact, that my boys have already demolished them all, and poor hubby who's out mountain biking won't get to try them. Well not this morning. Livvie's Diner is open every morning during quarantine for 3 special guests only.


Buckwheat Buttermilk Gluten Free Pancakes
If you don't have one of the flours listed don't fret. Just make sure you measure out 180g of flour total. Millet flour would be a lovely substitution. I wouldn't use coconut, cassava or potato with this recipe as they absorb too much liquid.

90 g almond flour
40 g buckwheat flour
30 g brown rice flour
20 g oat flour
1/2 tsp baking soda
1/2 tsp baking powder
1/2 tsp salt
2 tablespoons olive oil
2 tablespoons honey
1 tsp vanilla
1 1/3 cups buttermilk
2 medium or large eggs
butter for the skillet or pan

Measure out the buttermilk into a 2 or 4-cup measuring cup, then add all the liquid ingredients, including the eggs, and whisk with a fork to combine.

Put a large skillet or fry pan (preferablly NOT non-stick) on the stove on the lowest temperature possible. (The key to cooking killer pancakes, especially GF ones, is to make sure the pan is fully preheated but not too hot.)

Measure out the flours into a medium bowl, then add the baking powder, baking soda and salt. Whisk well to combine. Dump the wet ingredients into the dry and whisk until completely combined. (Unlike with pancakes made with wheat flour, you do NOT want clumps in this batter.)

Put a little butter into the pan, and scoop or spoon the pancake batter onto the preheated pan or skillet. Cook on one side until small bubbles appear on the uncooked side. (If you add chocolate chips or blueberries, you may not be able to see the bubbles so go by how brown the cooked side is getting.) Flip the pancakes and cook until golden brown. Repeat with remaining batter, making sure to use a little butter on the pan for each new batch.

Enjoy!

Sunday, May 17, 2020

Squirrel Cupcakes!


This is a project I would only ever agree to doing in quarantine. When my youngest took out a cupcake decorating cookbook ("What's New Cupcake?") and landed on a cupcake decorated as a squirrel, I knew I was done for. He is obsessed with squirrels, and here was a mini-cake that looked like a squirrel! His mind was blown.

I am not this type of baker. I do not particularly care for decorations, and I scornfully abhor cakes that look flawlessly, spectacularly gorgeous and taste like sawdust (wedding cakes, I'm looking at you!) I also hate high level of sugars in baked goods. Boxed mixes and frostings out of a jar are decidedly NOT my thing. And yet - because we are going a little crazy and any project that elicits enthusiasm from my kids seems like a good idea - we made squirrel cupcakes using a boxed mix and a fluff frosting that was so sickly sweet it literally made my head hurt. But the frosting was easy, fun to make and supremely easy to decorate with. So, for a kid birthday I will keep fluff frosting in mind.

The squirrel cupcakes were fun to make, although a little too complicated for my 5 year old. The directions I'll give below are simplified from the original. I wanted to give a general idea of how to create the squirrels without getting overly specific, because there are many ways to make the eyes and ears, and creative kids could really have a fun time experimenting. The tails look fabulous and are really fun to make. They would be good tails for skunks, foxes, maybe even a rainbow tailed unicorn? You can take this basic template and create lots of different creatures, just adjust your food coloring tinting of the frosting accordingly.


Fluff Frosting

The authors of "What's New Cupcake" call this frosting "Almost-Homemade Vanilla Buttercream." I would call it "Almost- Store-Bought" because it tastes just like the artificial junk you get at the store, and spreads like it as well. This is not my type of frosting but I do think it has a time and a place, like for decorating with kids. An 8-yr old could whip this up on his or her own with no issues. And if a crazy sugar high is the end result, well as long as it's not an everyday thing, I think it's worth the toothache for some independent baking.

3 sticks (3/4 lb) unsalted butter, at 70 degree room temperature (leave on the counter for a few hours beforehand)
1 16 ounce large container of Marshallow Fluff
1/2 cup confectioners' sugar
1 tsp vanilla

Using a standing mixer or handheld mixer, beat the room temperature butter until smooth and creamy. Add in the whole container of Fluff and beat until smooth. Slowly stir in the confectioners' sugar and vanilla.


Squirrel Cupcakes

What you'll need:
4 cupcakes baked in white paper liners
4 mini cupcakes
1 batch of frosting (above) or one 16-ounce jar vanilla frosting
black food coloring (McCormick)
white decorating sugar (optional)
pink decorating sugar (optional)
4 Stella D'oro brand breakfast cookies (can be found in most major supermarkets, either in cookie section near the Oreos or in imported Italian section)
8 pretzel sticks
1/4 cup semisweet chocolate chips
8 mini marshmallows
brown mini M&Ms, mini chocolate chips and/or brown jelly beans


Make the squirrel tails:


Trim your Stella D'oro cookies by slicing off the bottom 1/8 so that they look as tail-shaped as possible (see picture for reference.) Bake the Stella D'oro cookies in a preheated 350 degree oven for about 10 minutes, or until golden brown. (I think this is to dehyrdate the cookies and make them lighter, I skipped this step and some of my tails kept falling down. If you want to skip this step too just be forewarned that you might need to prop the tails up with an extra pretzel stick or too when you stick them into the cupcakes.) Melt the 1/4 cup chocolate chips in a glass bowl in the microwave by stirring every 10 seconds until completely melted. Spoon some melted chocolate onto the bottom of each cookie (please see picture for reference) and stick two pretzel sticks to each one, with half the pretzel stick hanging off the end.


Prep the bodies:
Remove 1/4 cup of the white frosting and place in a small ziplock bag, press out excess air and seal. Cut 1/8 inch off the tip to make a decorating bag.
Tint the rest of the frosting grey using the black food coloring.
Spread grey frosting on each cupcake top, and roll the edges in the white decorating sugar (optional).

Make the ears:
Use scissors to cut 4 mini marshmallows in half on the diagonal. Dip the cut ends in pink decorating sugar (optional, but recommended.)


Make the muzzles and nose:
Cut the remaining 4 mini marshmallows on the diagonal, to remove the bottom third of the marshmallow. The large piece is the muzzle. For the nose cut a brown jelly bean in half, or just use a mini M&M or a mini chocolate chip.

Assemble the heads:
Put a small dollop of grey frosting on the lower half of a mini cupcake. Attach the marshmallow muzzle, flat side against the cupcake and cut side toward the bottom edge. Now, you can either put your grey frosting in a ziplock piping bag or carefully use a small spatula or spoon, coat the muzzle and the head with grey frosting. Add the ears, coat the non-pink side in grey frosting. Add mini M&M or mini chocolate chip eyes, and optionally pipe in details like the eyelids and whiskers.

The finishing touches:
Add the heads to the bodies and pipe white frosting around the neck for fur tuft details. Cover the tails with grey frosting and pipe details if you like. Insert the tails into the cupcakes behind the squirrel heads, optionally using a dot of frosting at the back of the squirrel's head to help the tail stay upright. I just put the squirrels in a glass baking dish that conveniently held the tails upright without being noticeable, and once the frosting was completely set and cold from the refrigerator the tails stayed up once served onto plates.

Have fun with this one!


Sunday, April 19, 2020

Peanut Butter Chocolate Mini Cheesecakes


I must admit I wasn't going to blog about this recipe. But I posted photos on instagram and received so many recipe requests... so here we are! This cheesecake is insanely rich. It's decadence is almost obscene, and yet there is a homeiness to peanut butter that makes this dessert seem appropriate for quarantine, particularly when made in mini form. You can freeze them and pop them out whenever you need an isolation pick me up!

Cheesecake seems hard to make but in actuality it is one of the easiest desserts to make. All you need is a scale and a food processor! This particular recipe comes from the British baking goddess Nigella Lawson's cookbook "Kitchen." I highly recommend getting one of her cookbooks not only for the excellent and easy recipes but for the entertaining and acerbicly funny prologues to each recipe. (Part of her intro for this recipe states: "Unashamed indulgence, wallowingly so, is what this recipe is all about.") She recommends not cooking this cheesecake in a water bath (or "bain marie")  but I much prefer the silky texture a bain marie produces. I also made some variations to her suggested topping, as well as baking them in muffin tins to produce mini cakes.


I used Jiffy peanut butter for this recipe. In baking with peanut butter I almost always find that the commercialized junk is better, but in the name of science I will follow up with making this again with a natural peanut butter. If you use natural let me know how it goes!

Happy baking, stay safe friends.


Peanut Butter Chocolate Mini Cheesecakes

The measurements are listed in grams. If you do not have a scale but like to bake I highly recommend purchasing one so your baking can become instantly both easier and better. Measurements by weight are much more accurate and accuracy in baking is key. I did list cup measurement for the sour cream because I find scooping sour cream into a measuring cup immensely satisfying, and also I modified Nigella's topping and need to make it again in order to measure the topping ingredients by mL.

If you do not have silicone muffins liners then you can either bake a full cheesecake in an 11-inch springform pan for about 50 minutes, making sure to wrap the outside of the pan in tinfoil before pouring in the boiling water so that water cannot seep into the crack in the springform pan. Or you can use regular muffin tins and ditch the bain marie; your texture will not be as silky. Also I cannot guarantee that they will be easy to remove from the tins as I have not used this technique. They are incredibly easy to remove from the silicone liners - I highly recommend getting a set! 

Also it's extremely important that your ingredients be at full room temperature! If you try to make this with cold cream cheese.... just please don't. Plan ahead.

for the base:
200g graham crackers, gluten-free graham crackers, or digestive biscuits
50g salted peanuts or almonds
100g dark chocolate chips
50g unsalted butter, at room temperature

for the filling:
500g cream cheese, at room temperature
3 eggs, at room temperature
3 egg yolks (whites can be frozen to make meringues at a later date)
200g sugar
125ml (1/2 cup) sour cream, at room temperature
250g smooth peanut butter

for the topping: 
2/3 cup cup sour cream
2/3 cup heavy cream
100g semi-sweet chocolate chips
30g dark brown sugar

Preheat the oven to 350 and set a kettle of water on to boil.

Measure the base ingredients into a bowl set atop your scale. Dump the ingredients into your food processor then process until it starts to come together. (Use the pulse button and you will see the base start to clump.) Scrap the mixture back into the bowl you used to measure and set aside.

Wipe out the food processor with a paper towel and set the bowl of the food processor atop your scale. Measure out all the filling ingredients and add in the eggs. Process until completely smooth.

Measure out one tablespoon full of base mixture into each silicone liner, pressing down to make sure the mixture is packed down. Then measure out the filling mixture into each muffin liner, about two tablespoons worth for each one. Put the muffin liners into a large roasting pan then place in the preheated oven. Then very carefully pour in the boiling water into the roasting pan so that the water comes halfway up each muffin liner. Bake for anywhere from 12-20 minutes, until the filling is just set. (Baking times will depend on your oven.)

While the cheesecakes bake, make the topping. In a metal bowl combine the topping ingredients then place over a small pot of simmering water. Stir until all the chocolate chips have melted and you have a beautiful silky sauce.

Take the cheesecakes out of the water bath as soon as they come out of the oven. Pour a tablespoon of  the warm topping over each cheesecake. For aesthetic reasons, do not touch the topping after you pour it on, as it will mar the surface of the chocolate; pour carefully.

Place the cheesecakes in the fridge overnight then unmold before serving or freezing for later consumption.

Yum!


Tuesday, April 14, 2020

Quarantine Cooking


Recently there seems to have been a resurgence of 90s style email chains. But the only kind of chain email I would ever participate in would have to be food related. The text of one I received recently states the recipe you need to send to person in "spot #2" should be "something quick, easy and without rare ingredients.  Actually, the best one is the one you know in your head and can type right now or something you made this week." So naturally I took that advice as my central tenant and typed out the one dinner recipe I know from heart. It was something my mom cooked often when I was little, usually for times when another family came over for dinner and she needed to make something that would please both kids and adults. I remember calling my mom and asking for the recipe when I was a newly-wed and wanted to make it to serve to my cousins and their wives. (I made a double batch and there were no leftovers.) I've made it countless times since for my family. It is comforting, delicious, super easy, and super adaptable. 

The second recipe in my response email to the quarantine cooking exchange is one I've only just discovered. It comes via one of my favorite comfort-food bloggers of all time, Deb Pearlman at Smitten Kitchen, and she got it from Goop. It was a night when I didn't have much except rice and a few stray veggies in the frig, and I didn't expect much. But wow was I surprised! The sauce is beyond amazing. It turned a lack-luster, what-the-heck-can-we-eat night into one of the best meals of the month. 

So here are the two recipes I sent for the quarantine cooking exchange. I hope you and your families can enjoy them as well. Stay safe. Eat well. 


Bowties with Sausage and Cream

This is my go-to for a quick yet filling meal for the whole family. If you have picky eaters who don’t like spice you can omit the red chili pepper. If you don’t have heavy cream - don’t fret! It will taste good without it, but add in a little extra butter and/or a few teaspoons of sugar to taste. If you don’t have sweet italian sausage, any un-cooked sausage will work, and pre-cooked sausage could work in a pinch but you’d have to heat it up separately and add it in at the end. It’s easiest to use the kind of sausage meat that isn’t in actual sausage form, so that you don’t have to slit the sausages from their casings.

Pasta, any kind will work but bowties work best
1 lb sweet Italian sausage, uncooked (casings removed) 
1 28-oz jar crushed or whole tomatoes (if using whole, drain then chop)
¼ tsp red chili flakes (optional)
1 garlic clove, crushed or finely chopped (optional)
½ cup heavy whipping cream (or more if you want a creamier sauce)
Chopped parsley (optional)
Grated parmesan (optional)

Bring a large pot of water to boil and cook the pasta according to the package instructions.

While the pasta is cooking, make the sauce. Add a lug of oilive oil to a large saucepan over medium-high heat, and cook the sausage meat until lightly browned and cooked through, using a wooden spoon to break up the meat into little bits as it cooks. Add the garlic and red chili flakes and cook for 30 seconds, or until the garlic is fragrant. Add the tomatoes and bring to a boil. Reduce heat to low and simmer gently for 10 minutes. Stir in the heavy cream and cook for an additional minute, or until heated through. Toss with the pasta and serve topped with the chopped parsley and parmesan.


Miso Sesame Dressing for Grain & Veggie Bowls
from: Smitten Kitchen

Roast any vegetables you have on hand, and layer them on top of greens and/or grains and top with this AMAZING sauce. Literally, SO GOOD. If you aren’t the kind of person who has white miso in their fridge at all times, well, now is a good time to become one, if only for this particular sauce! Trust me, you'll want to make it all the time.

1 tablespoon minced fresh ginger
1 small garlic clove, minced or pressed
2 tablespoons white miso
2 tablespoons tahini (other nut butters can work in a pinch)
1 tablespoon honey
1/4 cup rice vinegar
2 tablespoons toasted sesame oil
2 tablespoons olive oil

Put all ingredients in a blender or food processor and blitz till smooth. Throw sauce on top of your roast veg & green & grain bowl!

Friday, April 3, 2020

Peanut Butter Frosting


This is a time of intense dualities.

We feel elated to have one-on-one time with our children all day, and we feel overwhelmed by the responsibility of being parents and teachers. We feel grateful we are safe and comfortable at home, and we grieve for all those who are dying and those who will die.We feel relieved that we have no social obligations, and we feel the absence of our daily social interactions acutely, viscerally.

Here's a recipe and an activity idea that embraces duality. It is a drastic break from my baking ethos (which is - and has always been - baking from scratch). It combines time-saving convenience with a homemade frosting so good it tastes impossibly luxurious given it's simplicity.

So here goes. Take your favorite cake mix and bake some cupcakes. Then have your kids (or your spouse, or a zoom date) help you make this delicious frosting and decorate the cupcakes with sprinkles and love. If you want to get fancy like I did, pipe the frosting in fun designs, using either a pastry bag or simply a plastic bag with a teeny hole cut in the end. If elegant pipe-work coming out of the end of a ziploc bag isn't a gorgeous illustration of dualities.... well then I'll eat my homemade no-sew t-shirt mask.


Peanut Butter Frosting

This is an occasion where commercial peanut butter is the best choice. 
You can make your own confectioners sugar if you have regular sugar and cornstarch. 


10 ounces cream cheese, at room temperature*
1 stick (4 ounces) unsalted butter, at room temperature
5 cups confectioners' sugar, sifted**
2/3 cup smooth peanut butter (Jiffy brand or similar)

Beat the cream cheese and butter together with a hand-held mixer or by hand (the cream cheese and the butter should be soft enough that you can easily do this with a wooden spoon). Slowly mix in the confectioners' sugar cup by cup. Stir in the peanut butter. Spread on cupcakes, or eat by the spoonful.

*Make sure your butter and cream cheese are soft enough to poke a finger through.
**If your confectioners' sugar is not chunky you don't need to sift it. 

Tuesday, February 4, 2020

Healthy, Best-Ever Pumpkin Muffins

My preschooler is currently in a classroom where there is a dairy allergy, a gluten allergy, and a peanut allergy. These are my go-to muffins for a healthy snack generally, and given their allergen-friendliness, the preschool class might be sick of these by the end of the year! I never will be though. There muffins strike just the right balance of spice and sweet. They are very healthy as well, since they use whole grains and very little sugar. Feel free to substitute maple syrup, agave syrup or plain old granulated sugar for the honey. Maple syrup has the lowest GI and is therefore the healthiest, I just personally prefer the flavor of the honey with pumpkin spices. You can also substitute a healthier oil for the canola oil. Acceptable alternatives would be a mild olive oil, or coconut oil (melted then measured - make sure you have eggs at room temperature or it won't mix properly).

I've blogged about pumpkin muffins twice before. A vegan version and a whole wheat one. In fact, an astute observer would notice that this recipe is almost exactly the same as the whole wheat one, with just some slight modifications. The biggest modification of course is that the sugar in this recipe is cut down to one third! Sugar is the real villain in our diets, and any ways in which you can cut it down, or replace it with a lower GI version, will positively impact your health. In fact, did you know that children AND adult women are only supposed to have 25 grams of sugar in one day??


Now, I don't want to be alarmist by posting this infographic, but it is something to be cognizant of, much more so than how much fat you are consuming. The research all backs this up. So bake these lower sugar muffins and delight in homemade pumpkin spice goodness, without any sugar-guilt.


Best ever Pumpkin Muffins

I make these with my own gluten-free flour blend of 1:1:1 almond, white rice and millet flour to 1/2 part tapioca flour... all weighed on a scale to equal what 1 1/2 cup of wheat flour weighs, which is 180 grams. If you aren't using a "cup-to-cup" GF flour blend (I like the King Arthur "measure for measure" GF flour blend), then you should always weigh your flours instead of measuring by volume. 

1/2 cup (50 g) quick rolled oats
1/4 cup (30 g) flaxseed meal or almond flour
1 1/2 cup (180 grams) whole wheat flour or gluten-free flour blend, see note above
1 tsp baking powder
1/2 tsp salt
1/2 tsp baking soda
1/2 tsp cinnamon
1/2 tsp ginger
1/4 tsp cloves
2 eggs
1/3 cup canola oil
1/3 cup honey
1 tbsp molasses
1 cup + 2 tbsp (8 oz) pumpkin puree

Whisk dry ingredients in a large bowl until thoroughly combined. Whisk wet ingredients and sugar in a smaller bowl till thoroughly combined. Make a small well in the dry ingredients then dump in the wet ingredients and stir with a spatula until just combined (especially if using wheat flour, do not overmix or the muffins will be tough.)

Bake for 20-25 minutes, or until the tops spring back lightly when touched or a toothpick comes out with moist crumbs (or clean).

Saturday, January 25, 2020

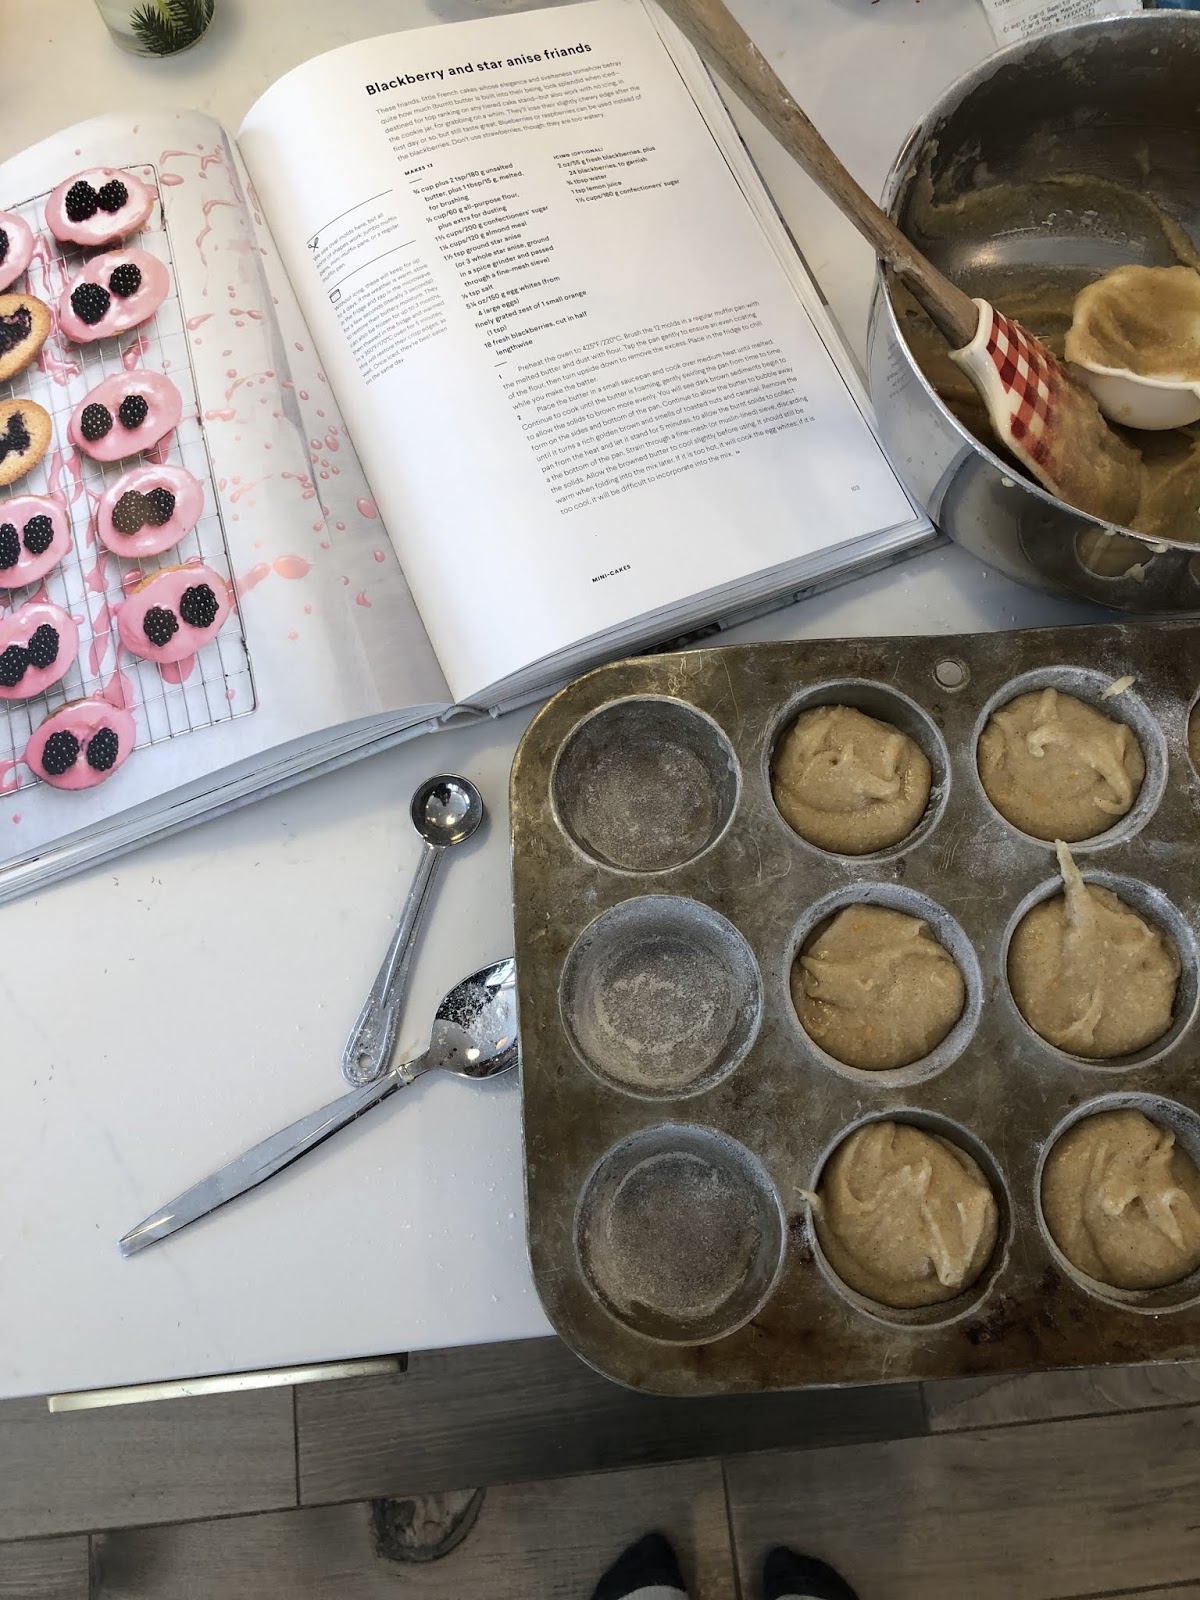
Berry Friands


This recipe is why I love to spend copious amounts of my not-so-plentiful spare time baking. These friands are beyond heavenly, and they are joyful to make. Moderately complicated while not too technical, time-consuming but able to be done in stages... all resulting in a product that is gorgeous in appearance and taste. What is a friand, you might ask? A little french cake, made with almond flour, egg whites and confectioners sugar. This recipe out of Ottolenghi's cookbook of desserts is original in its spices and its garnish. The original recipe called for star anise but I didn't even bother to try to find that it in any of our tiny local grocery stores. Instead I used Chinese Five Spice, which I had on hand, because the main spice in Chinese Five Spice is star anise. But please use star anise if you have it, or if you happen to live in a place with adequate grocery stores and specialty shops, go buy it. In a pinch, I feel that cardamon would also have been a good substitute, but perhaps only use 1 tsp.


Other than spice-sourcing, the only other difficulty I encountered with the original recipe (which led to some modification in my version written below) is that Ottolenghi and Goh instruct you to brown the butter until nutty. Even though I have browned butter in the past, on this occasion my butter was exploding! Like, bam! butter all over the stovetop... two seconds later... bam! butter all over my shirt. So I decided to cut my losses (and my cleaning up) by only cooking the butter for 2 minutes instead of as instructed. Further research has illuminated that I should have been stirring constantly and this wouldn't have happened... I will write the recipe below as I made it, not as Ottolenghi does, but if you like the brown butter taste, then please, brown your butter! I felt like the brown butter may have distracted from the wonderful play between the spice and the berry, but perhaps not. I think this means I have to make them again soon, just to be sure.


One more thing... next time I make these, I will most certainly double the recipe. These beauties are too delicious and too gorgeous to not give out as little surprise gifts to whomever may be stopping by, and the 12 this recipe make are easily consumed by my crew itself in a few days. It will be lovely next time to have spare friands to dole out. Playdate drop-off? Here's a mini-cake! Mail lady? Mini-cake! Preschool teachers? Have a friand! What a wonderful way to spread joy.


Berry Friands

adapted from "Sweet" by Yotam Ottolenghi and Helen Goh

Wash the berries before starting the recipe and lay them out on a clean dishtowel to dry. Berries should be completely dry before using them. Blueberries could also be used. 

Also please SIFT the flour, almond flour, and confectioners sugar together with a flour sifter. Don't be tempted to just whisk it all, this is an occasion where the tedium of the flour sifter is necessary. For the icing, if you have fresh, un-chunky confectioners sugar, then don't bother with the sifter.

for friands:
180 g (3/4 cup plus 2 tbsp) butter, plus 1 tbsp (15 g) melted butter for brushing tins
60 g (1/2 cup) all-purpose flour (or all-purpose GF flour), plus extra for dusting tins
200 g (1 2/3 cup) confectioner's sugar
120 g (1 1/4 cup) almond meal
1 1/2 tsp chinese five-spice (or ground star anise)
1/4 tsp salt
150 g egg whites (4 large egg whites)
finely grated zest of 1 small orange (about 1 tsp)
18 fresh and dry blackberries, cut in half lengthwise, or 36 small fresh and dry raspberries

for optional but highly recommended icing:
55 g (2 oz) fresh blackberries
12-24 individual blackberries or raspberries for garnish
3/4 tbsp water
1 tsp lemon juice
160 g (1 1/3 cup) confectioners' sugar

Brush 12 muffin tins or oval molds with the melted butter. Dust with flour, and ensure you have a good coating. Tap out excess flour. Place in the fridge to chill.

Preheat oven to 425. Place the butter in a medium saucepan and cook over medium-low heat until melted. Continue to cook until butter is foaming and solids have formed at the bottom of the pan, about 2 minutes. Pour through a fine-mesh sieve. Allow to cool to warm before adding to the egg white mixture in a few steps. (If too hot, it will cook the egg whites, however it can't be too cooled off or you won't be able to mix it in.)

While butter is cooling, sift the flour, almond flour, confectioners sugar, spice and salt into a bowl. Place egg whites in a small bowl and whisk them to a very slight froth (they do not need to be whisked completely, just for a few seconds.) Pour the egg whites into the sifted dry ingredients and stir until they are incorporated. Add the orange zest and melted butter and mix until the batter is smooth.

Remove muffin pan from fridge and spoon batter into prepared molds 2/3 of the way up the sides of each mold. Place 3 halved blackberries (or 3 whole raspberries) on top, cut side down. Bake for 10 minutes. Lower oven to 400, rotate the pan, and cook for another 8 minutes, or until the edges are crisp golden brown and the tops spring back lightly when touched in the center. Set aside on a rack to cool completely before unmolding.

To make icing, place the 55 g (2 oz) of blackberries in a small bowl with the water and lemon juice. Use a fork to mash them together well, then press the mixture through a fine mesh seive, pressing hard to extract as much juice as possible. Sift the confectioners sugar into a medium bowl, pour in the blackberry juice and combine to make a beautiful lilac-hued icing.


Unmold the cooled cakes onto a rack (using a plate will cause the icing to pool around the edges.) Spoon icing over the cakes. (Use less than you think you need for each one, to ensure that you have enough icing to go around.) Immediately place two berries on top of each cake for decoration. Allow 30 minutes for the icing to set before moving or serving the friands. Best eaten the day they are made. If you refrigerate them, allow them to come to room temperature before serving.