Friday, April 3, 2020
Peanut Butter Frosting
This is a time of intense dualities.
We feel elated to have one-on-one time with our children all day, and we feel overwhelmed by the responsibility of being parents and teachers. We feel grateful we are safe and comfortable at home, and we grieve for all those who are dying and those who will die.We feel relieved that we have no social obligations, and we feel the absence of our daily social interactions acutely, viscerally.
Here's a recipe and an activity idea that embraces duality. It is a drastic break from my baking ethos (which is - and has always been - baking from scratch). It combines time-saving convenience with a homemade frosting so good it tastes impossibly luxurious given it's simplicity.
So here goes. Take your favorite cake mix and bake some cupcakes. Then have your kids (or your spouse, or a zoom date) help you make this delicious frosting and decorate the cupcakes with sprinkles and love. If you want to get fancy like I did, pipe the frosting in fun designs, using either a pastry bag or simply a plastic bag with a teeny hole cut in the end. If elegant pipe-work coming out of the end of a ziploc bag isn't a gorgeous illustration of dualities.... well then I'll eat my homemade no-sew t-shirt mask.
Peanut Butter Frosting
This is an occasion where commercial peanut butter is the best choice.
You can make your own confectioners sugar if you have regular sugar and cornstarch.
10 ounces cream cheese, at room temperature*
1 stick (4 ounces) unsalted butter, at room temperature
5 cups confectioners' sugar, sifted**
2/3 cup smooth peanut butter (Jiffy brand or similar)
Beat the cream cheese and butter together with a hand-held mixer or by hand (the cream cheese and the butter should be soft enough that you can easily do this with a wooden spoon). Slowly mix in the confectioners' sugar cup by cup. Stir in the peanut butter. Spread on cupcakes, or eat by the spoonful.
*Make sure your butter and cream cheese are soft enough to poke a finger through.
**If your confectioners' sugar is not chunky you don't need to sift it.
Tuesday, February 4, 2020
Healthy, Best-Ever Pumpkin Muffins
My preschooler is currently in a classroom where there is a dairy allergy, a gluten allergy, and a peanut allergy. These are my go-to muffins for a healthy snack generally, and given their allergen-friendliness, the preschool class might be sick of these by the end of the year! I never will be though. There muffins strike just the right balance of spice and sweet. They are very healthy as well, since they use whole grains and very little sugar. Feel free to substitute maple syrup, agave syrup or plain old granulated sugar for the honey. Maple syrup has the lowest GI and is therefore the healthiest, I just personally prefer the flavor of the honey with pumpkin spices. You can also substitute a healthier oil for the canola oil. Acceptable alternatives would be a mild olive oil, or coconut oil (melted then measured - make sure you have eggs at room temperature or it won't mix properly).
I've blogged about pumpkin muffins twice before. A vegan version and a whole wheat one. In fact, an astute observer would notice that this recipe is almost exactly the same as the whole wheat one, with just some slight modifications. The biggest modification of course is that the sugar in this recipe is cut down to one third! Sugar is the real villain in our diets, and any ways in which you can cut it down, or replace it with a lower GI version, will positively impact your health. In fact, did you know that children AND adult women are only supposed to have 25 grams of sugar in one day??

Now, I don't want to be alarmist by posting this infographic, but it is something to be cognizant of, much more so than how much fat you are consuming. The research all backs this up. So bake these lower sugar muffins and delight in homemade pumpkin spice goodness, without any sugar-guilt.
Best ever Pumpkin Muffins
I make these with my own gluten-free flour blend of 1:1:1 almond, white rice and millet flour to 1/2 part tapioca flour... all weighed on a scale to equal what 1 1/2 cup of wheat flour weighs, which is 180 grams. If you aren't using a "cup-to-cup" GF flour blend (I like the King Arthur "measure for measure" GF flour blend), then you should always weigh your flours instead of measuring by volume.
1/2 cup (50 g) quick rolled oats
1/4 cup (30 g) flaxseed meal or almond flour
1 1/2 cup (180 grams) whole wheat flour or gluten-free flour blend, see note above
1 tsp baking powder
1/2 tsp salt
1/2 tsp baking soda
1/2 tsp cinnamon
1/2 tsp ginger
1/4 tsp cloves
2 eggs
1/3 cup canola oil
1/3 cup honey
1 tbsp molasses
1 cup + 2 tbsp (8 oz) pumpkin puree
Whisk dry ingredients in a large bowl until thoroughly combined. Whisk wet ingredients and sugar in a smaller bowl till thoroughly combined. Make a small well in the dry ingredients then dump in the wet ingredients and stir with a spatula until just combined (especially if using wheat flour, do not overmix or the muffins will be tough.)
Bake for 20-25 minutes, or until the tops spring back lightly when touched or a toothpick comes out with moist crumbs (or clean).
I've blogged about pumpkin muffins twice before. A vegan version and a whole wheat one. In fact, an astute observer would notice that this recipe is almost exactly the same as the whole wheat one, with just some slight modifications. The biggest modification of course is that the sugar in this recipe is cut down to one third! Sugar is the real villain in our diets, and any ways in which you can cut it down, or replace it with a lower GI version, will positively impact your health. In fact, did you know that children AND adult women are only supposed to have 25 grams of sugar in one day??

Now, I don't want to be alarmist by posting this infographic, but it is something to be cognizant of, much more so than how much fat you are consuming. The research all backs this up. So bake these lower sugar muffins and delight in homemade pumpkin spice goodness, without any sugar-guilt.
Best ever Pumpkin Muffins
I make these with my own gluten-free flour blend of 1:1:1 almond, white rice and millet flour to 1/2 part tapioca flour... all weighed on a scale to equal what 1 1/2 cup of wheat flour weighs, which is 180 grams. If you aren't using a "cup-to-cup" GF flour blend (I like the King Arthur "measure for measure" GF flour blend), then you should always weigh your flours instead of measuring by volume.
1/2 cup (50 g) quick rolled oats
1/4 cup (30 g) flaxseed meal or almond flour
1 1/2 cup (180 grams) whole wheat flour or gluten-free flour blend, see note above
1 tsp baking powder
1/2 tsp salt
1/2 tsp baking soda
1/2 tsp cinnamon
1/2 tsp ginger
1/4 tsp cloves
2 eggs
1/3 cup canola oil
1/3 cup honey
1 tbsp molasses
1 cup + 2 tbsp (8 oz) pumpkin puree
Whisk dry ingredients in a large bowl until thoroughly combined. Whisk wet ingredients and sugar in a smaller bowl till thoroughly combined. Make a small well in the dry ingredients then dump in the wet ingredients and stir with a spatula until just combined (especially if using wheat flour, do not overmix or the muffins will be tough.)
Bake for 20-25 minutes, or until the tops spring back lightly when touched or a toothpick comes out with moist crumbs (or clean).
Saturday, January 25, 2020
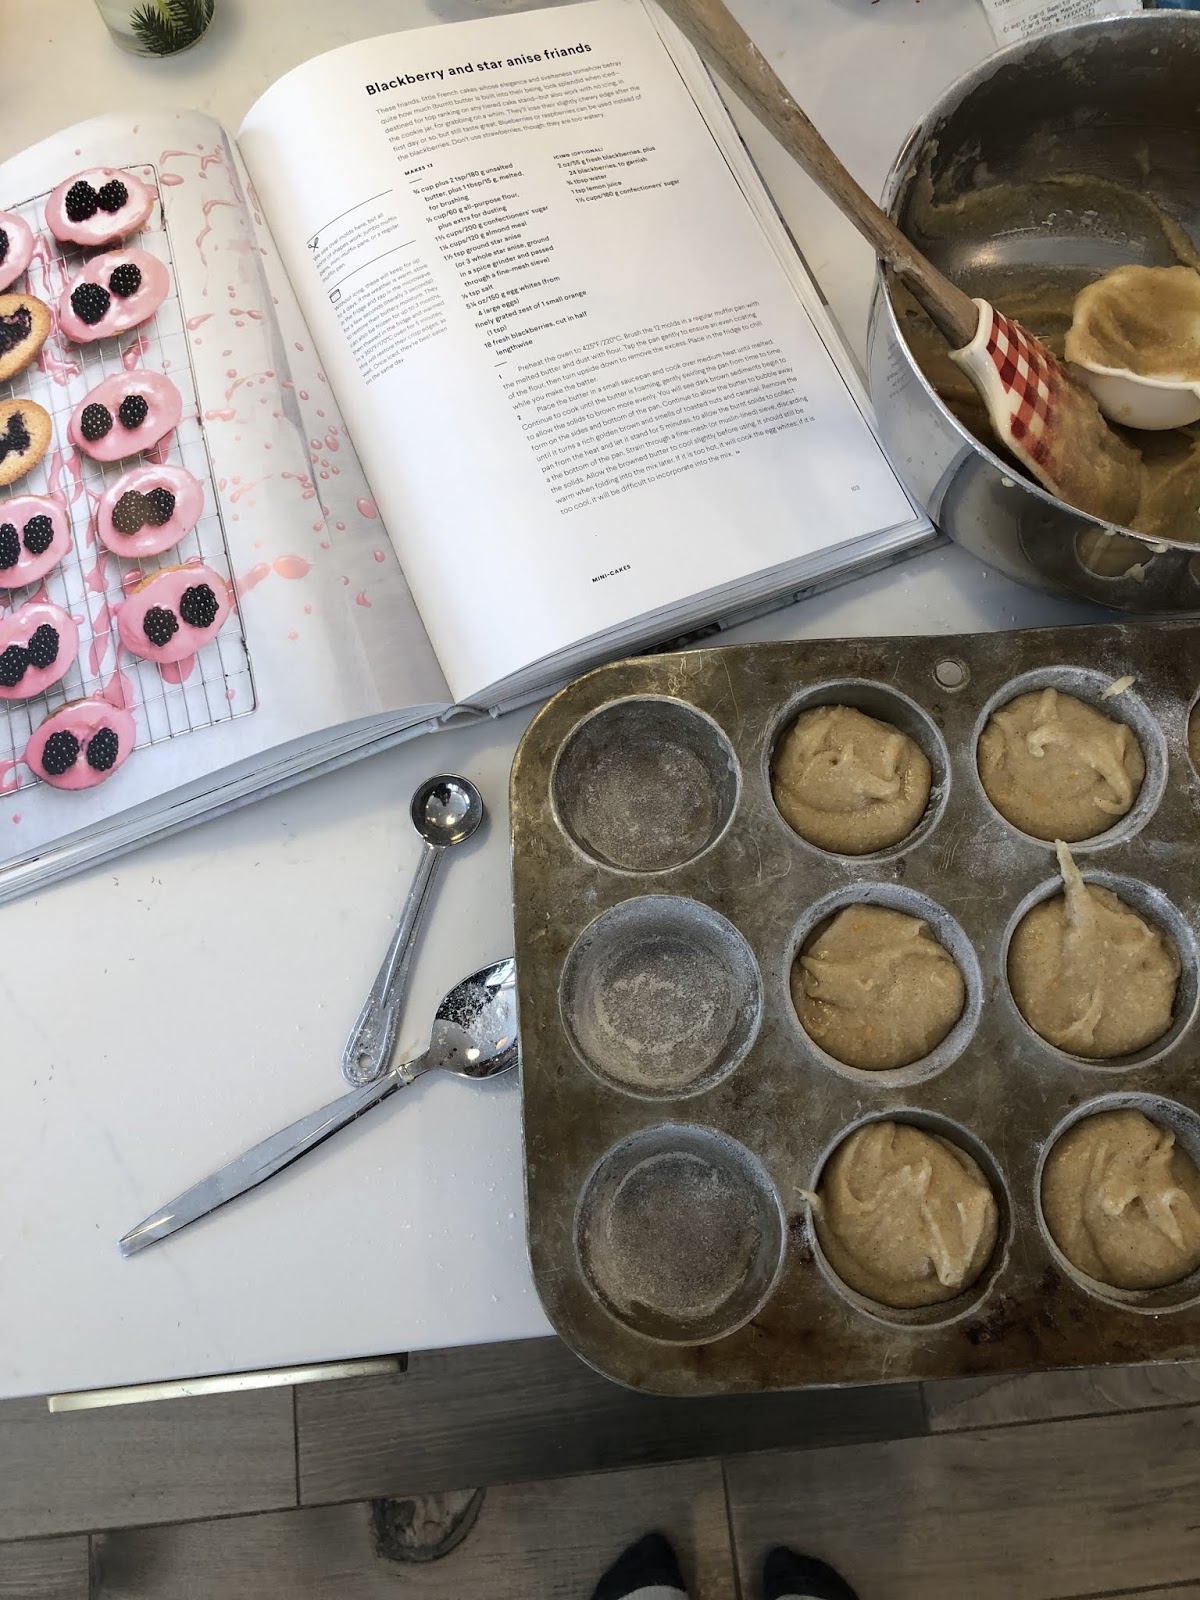
Berry Friands
This recipe is why I love to spend copious amounts of my not-so-plentiful spare time baking. These friands are beyond heavenly, and they are joyful to make. Moderately complicated while not too technical, time-consuming but able to be done in stages... all resulting in a product that is gorgeous in appearance and taste. What is a friand, you might ask? A little french cake, made with almond flour, egg whites and confectioners sugar. This recipe out of Ottolenghi's cookbook of desserts is original in its spices and its garnish. The original recipe called for star anise but I didn't even bother to try to find that it in any of our tiny local grocery stores. Instead I used Chinese Five Spice, which I had on hand, because the main spice in Chinese Five Spice is star anise. But please use star anise if you have it, or if you happen to live in a place with adequate grocery stores and specialty shops, go buy it. In a pinch, I feel that cardamon would also have been a good substitute, but perhaps only use 1 tsp.
Other than spice-sourcing, the only other difficulty I encountered with the original recipe (which led to some modification in my version written below) is that Ottolenghi and Goh instruct you to brown the butter until nutty. Even though I have browned butter in the past, on this occasion my butter was exploding! Like, bam! butter all over the stovetop... two seconds later... bam! butter all over my shirt. So I decided to cut my losses (and my cleaning up) by only cooking the butter for 2 minutes instead of as instructed. Further research has illuminated that I should have been stirring constantly and this wouldn't have happened... I will write the recipe below as I made it, not as Ottolenghi does, but if you like the brown butter taste, then please, brown your butter! I felt like the brown butter may have distracted from the wonderful play between the spice and the berry, but perhaps not. I think this means I have to make them again soon, just to be sure.One more thing... next time I make these, I will most certainly double the recipe. These beauties are too delicious and too gorgeous to not give out as little surprise gifts to whomever may be stopping by, and the 12 this recipe make are easily consumed by my crew itself in a few days. It will be lovely next time to have spare friands to dole out. Playdate drop-off? Here's a mini-cake! Mail lady? Mini-cake! Preschool teachers? Have a friand! What a wonderful way to spread joy.
Berry Friands
adapted from "Sweet" by Yotam Ottolenghi and Helen Goh
Wash the berries before starting the recipe and lay them out on a clean dishtowel to dry. Berries should be completely dry before using them. Blueberries could also be used.
Also please SIFT the flour, almond flour, and confectioners sugar together with a flour sifter. Don't be tempted to just whisk it all, this is an occasion where the tedium of the flour sifter is necessary. For the icing, if you have fresh, un-chunky confectioners sugar, then don't bother with the sifter.
for friands:
180 g (3/4 cup plus 2 tbsp) butter, plus 1 tbsp (15 g) melted butter for brushing tins
60 g (1/2 cup) all-purpose flour (or all-purpose GF flour), plus extra for dusting tins
200 g (1 2/3 cup) confectioner's sugar
120 g (1 1/4 cup) almond meal
1 1/2 tsp chinese five-spice (or ground star anise)
1/4 tsp salt
150 g egg whites (4 large egg whites)
finely grated zest of 1 small orange (about 1 tsp)
18 fresh and dry blackberries, cut in half lengthwise, or 36 small fresh and dry raspberries
for optional but highly recommended icing:
55 g (2 oz) fresh blackberries
12-24 individual blackberries or raspberries for garnish
3/4 tbsp water
1 tsp lemon juice
160 g (1 1/3 cup) confectioners' sugar
Brush 12 muffin tins or oval molds with the melted butter. Dust with flour, and ensure you have a good coating. Tap out excess flour. Place in the fridge to chill.
Preheat oven to 425. Place the butter in a medium saucepan and cook over medium-low heat until melted. Continue to cook until butter is foaming and solids have formed at the bottom of the pan, about 2 minutes. Pour through a fine-mesh sieve. Allow to cool to warm before adding to the egg white mixture in a few steps. (If too hot, it will cook the egg whites, however it can't be too cooled off or you won't be able to mix it in.)
While butter is cooling, sift the flour, almond flour, confectioners sugar, spice and salt into a bowl. Place egg whites in a small bowl and whisk them to a very slight froth (they do not need to be whisked completely, just for a few seconds.) Pour the egg whites into the sifted dry ingredients and stir until they are incorporated. Add the orange zest and melted butter and mix until the batter is smooth.
Remove muffin pan from fridge and spoon batter into prepared molds 2/3 of the way up the sides of each mold. Place 3 halved blackberries (or 3 whole raspberries) on top, cut side down. Bake for 10 minutes. Lower oven to 400, rotate the pan, and cook for another 8 minutes, or until the edges are crisp golden brown and the tops spring back lightly when touched in the center. Set aside on a rack to cool completely before unmolding.
To make icing, place the 55 g (2 oz) of blackberries in a small bowl with the water and lemon juice. Use a fork to mash them together well, then press the mixture through a fine mesh seive, pressing hard to extract as much juice as possible. Sift the confectioners sugar into a medium bowl, pour in the blackberry juice and combine to make a beautiful lilac-hued icing.
Unmold the cooled cakes onto a rack (using a plate will cause the icing to pool around the edges.) Spoon icing over the cakes. (Use less than you think you need for each one, to ensure that you have enough icing to go around.) Immediately place two berries on top of each cake for decoration. Allow 30 minutes for the icing to set before moving or serving the friands. Best eaten the day they are made. If you refrigerate them, allow them to come to room temperature before serving.

Saturday, January 18, 2020
Easy, Peasy Dairy-Free Chocolate Pudding!
I have always loved chocolate pudding. When I was a kid I would just beg my mom in the grocery store to buy the little individual SnackPack puddings in the refrigerated section to put in my backpack for school... Please! Please! Pleaaaaaaaeeeeaase? My mom was not one to give in to pleading, and religiously denied all SnackPack requests. But the two of us did make chocolate pudding from the little Jell-O packs together - baking of any sort, and particularly the chocolate sort, was always an encouraged activity. (The extent to which I love a certain type of food can be determined by whether I will eat said type of food in it's most processed form.... Although it makes me more than slightly ashamed to say so - I STILL love Jell-O chocolate pudding.) When I went to visit my grandparents' house in New Jersey we would make chocolate pudding from scratch, although my grandmother called it custard. Milk, cream, eggs, chocolate. It was like an alchemy lab how it all managed to come together in a silky cold chocolaty dream at the end. As a teenager and an adult I continued to make pudding with eggs. Now pudding made with eggs can be tricky. It can end badly. The pudding recipe I present to you now will not end up badly. There are NO EGGS! Can you imagine? Just cornstarch to thicken your pudding up to beautiful silky bliss. And even better then no eggs, there is NO MILK! Or at least, no cows milk. I am not dairy-intolerant, but I have made this same pudding recipe both with milk and cream and with oatmilk and I can honestly say I much prefer the version made with oatmilk. It tastes cleaner, brighter and more chocolaty. Now go on and make a batch. Pleaaaaase? You won't regret it.
Oatmilk Chocolate Pudding
I found this recipe via the NYTimes; they had adapted Alice Medrich's cow-milk and cream based one by merely substituting oatmilk for the milk and cream, and omitting the rum (bad omission, that.)
If you are using chocolate with a cocoa content of 70% or higher then use just 3 ounces, not 4 ounces. And remember the chocolate you use will determine the taste of the pudding, so make sure you use one you love. I made this most recently with Tollhouse Chocolate Chips.... a low-brow chocolate it may be, but a pudding divine it did make.
1/3 cup (65 grams) sugar
1/3 cup (30 grams) natural unsweetened cocoa powder (not dutch-processed)
2 tablespoons conrstarch
1/8 tsp salt
2 cups (480 ml) good quality oatmilk (I prefer Oatly brand)
4 ounces (115 grams) semi-sweet chocolate, finely chopped, or chips (see note above)
1 tsp vanilla
1 tbsp rum (optional)
Have 8 small ramekins, or one large cereal bowl ready on the counter.
Place the sugar, cocoa powder, cornstarch and salt in a large saucepan and whisk until thoroughly combined. Add 1/4 cup of the oatmilk slowly and whisk until you have a smooth chocolate paste. Then slowly whisk in the remainder of the oatmilk.
Put the pan on the burner and turn the heat to medium and STIR CONSTANTLY with a wooden spoon - scraping the bottoms and sides of the pan with your spoon - until the pudding is thickened, bubbly at the edges, and coats the back of the spoon, which should take about 5-7 minutes. Turn heat off and stir in the chopped chocolate vigorously, until all pieces or chips are melted and pudding is smooth. Remove pan from stovetop and pour into ramekins or bowl. Refrigerate until ready to eat. If you don't like skins on your pudding then press plastic wrap firmly to the top of each pudding before putting in the frig. I am on Alice's team for this one - I like the skin. But to each her chocolatey own. Top with whipped cream and raspberries to make this a fancy dessert. (No one but you need know this humble dessert is this easy to make!)
Saturday, January 11, 2020
Coconut Chocolate Yogurt Cake (Gluten Free)

There's a trend that's gaining traction this "Resolution" season that I both admire and cannot do. And that is Dry January. It's not that I'm not all for taking a month break from alcohol. It's just.... in January?? We are talking about the coldest, darkest, most dreary month of the entire year. And you want me to stop drinking? I really don't think so. January is too damn dark and cold to be sober for. (Instead, I'm all in for a Sober October!)
However, I have read some convincing news outlet pieces about the benefits of not drinking so I will try to cut back - a bit - this month. In one rather odd essay I read in a national parenting magazine, an author advocated for smoking weed in order to help cut back on drinking. (I kid you not.) In the vein of that very alarming logic, I'll advocate for my own advice to help you drink less..... Eat cake!!!!
To help you with your resolutions, here is a glorious healthy-ish cake that you can savor instead of your second glass of pinot. There's yogurt in it too... so obviously it's healthy. I concocted this recipe back in 2018 when I was newly gluten-free. I cannot remember which original recipe it was based upon, although I'm fairly certain it was a french-american blogger who used wheat flour and melted butter. You can easily make this dairy-free by using a coconut yogurt or a nut-milk yogurt, just make sure you use one without sugar. This cake is best eaten the day it is made. It is great with afternoon tea! (Is anyone doing a caffeine-free January? Now that is one thing I definitely could NOT do.)
Coconut Chocolate Yogurt Cake (Gluten Free)
Make sure all your ingredients, including the yogurt and the eggs, are at room temperature before you begin. To measure out the coconut oil, place glass jar of oil in the microwave until it is melted, and then measure out 1/3 cup of the melted oil. Of course, if you live in very warm place, your jar of coconut oil will already be melted from the get-go.... lucky you.
1 cup (98 g) almond meal flour
1 cup (152 g) buckwheat flour
1/3 cup (38 g) dutch-process cocoa powder
1 1/2 tsp baking powder
1/2 tsp baking soda
1/2 tsp salt
1 cup (226 g) whole-milk plain yogurt3/4 cup (165 g) sugar
2 large eggs
1/3 cup melted coconut oil
1/2 cup (118 g) unsweetened applesauce
1 tsp vanilla
Preheat oven to 350. Grease an 8-inch or 9-inch round cake pan and line the bottom with parchment, or use a reusable silicone liner. Grease the parchment or liner.
Whisk dry ingredients (minus sugar) together in one large bowl. Whisk wet ingredients (and sugar) together in another medium bowl. Dump wet ingredients into dry ingredients and stir together until completely blended.
Spread batter evenly into prepared pan. Bake for 20-30 minutes or until a toothpick inserted into the center comes out with moist crumbs. Let cool in pan on a rack for ten minutes before carefully inverting onto a cake stand or plate. Frost with coconut whipped cream or simply sift confectioner's sugar on top.
Wednesday, October 30, 2019
Sichuan to save the world - Vegetarian Ma Po Tofu
Our planet is headed towards disaster, and one of the ways scientists recommend we can greatly help limit our chances of mass extinction is to eat.... no meat! Going burger-less may be hard to fathom for many, me included. And I do think there are other ways of reducing greenhouse gases that are easier to - er - swallow, such as cooking dishes that use the WHOLE animal. (I have always loved offal, and I love that I now have a moral imperative backing that love.) However, the alarming climate report has encouraged me to cook vegetarian more frequently. My favorite veg dish so far has been a recipe that Mark Bittman calls "Fast-Braised Tofu with Tempeh" in his masterpiece cookbook "How to Cook Everything Vegetarian." Now, "Fast-Braised Tofu with Tempeh" doesn't really roll off the tongue, nor inspire any culinary yearnings. Ma Po Tofu though... well that is a name that should resonate with anyone who's ordered Chinese food. The soft melty tofu paired with the fiery, pork-filled sauce... YUM. But who knew replacing a fermented soybean product (tempeh) with the pork would yield similarly mouth-watering stuff? Well, it does. Spice up your meat-less weekdays with this recipe tonight. Get in some healthy stuff before the candy-binge of Halloween tomorrow. You're welcome. ;)
Vegetarian Ma Po Tofu
Adapted from Mark Bittman's fabulous "How to Cook Everything Vegetarian"
I give a wide range on the measurements for the chili below. Bittman calls for just a 1/4 tsp of chili flakes which is a tragically minimal amount of heat for any dish, let alone one that hails from the Chinese province of smoking-hot foods. Although to get to true Sichuan levels of spice I think you'd have to add at least 4 tbsp of sambal oolek (...which is actually of Indonesian origins - true Sichuan fans you'll have to forgive me here.)
I highly recommend the frozen ginger cubes from Trader Joe's - frozen in teaspoon size portions - it's amazing - go buy a tray or two and thank me later.
Don't use firm tofu.
Serves 2 as a main dish
1/4 cup grapeseed or peanut oil
8 ounces tempeh, crumbled by hand into bits
2 tbsp minced garlic
2 tbsp minced peeled fresh ginger (or frozen)
1-2 tbsp sambal oelek or 1/4-1 tsp red chili pepper flakes
green parts only of 1 bunch of scallions, chopped (about 1 cup)
3/4 cup vegetable stock (I use "better than boullion" to make broth and stock - another tasty hack to save the planet)
1 lb soft or silken tofu, cut into 1/2 inch cubes
1/4 cup tamari (or soy sauce if being gluten-free isn't an issue for you or your guests)
minced fresh cilantro for garnish (optional)
Heat half the oil in a large frying pan over medium-high heat. When the oil is shimmering, fry the tempeh - stirring occasionally - until every piece is brown and crisp, about 10 minutes. Using a slotted spoon, put the tempeh on a paper-towel lined plate and set aside.
Add the remaining oil to the pan. Add the garlic, ginger and your desired amount of sambal oelek or chili flakes and cook just until the garlic begins to sizzle, less than a minute. Add the scallions and stir, then add the stock, then add the tofu. Cook, stirring a few times, just until the tofu is heated through, then turn off the heat.
Stir in the tamari and the tempeh. Taste and add more sambal oelek or chili flakes if necessary. (Or serve more sambal oelek on the side.) Garnish with cilantro and serve with white rice.
Monday, March 11, 2019
Vegan and Gluten-free Blender Pumpkin Pie Muffins
I just got a wonderful email asking me for my advice about baking snacks for the preschool kids at my son's school. It is so gratifying to be called out for something you are so passionate about (thanks Emily!) I had planned to spend all morning paying bills and organizing but this opportunity to procrastinate by writing about baking was too good to pass up. And besides, I realized that, despite having been making these "muffins" regularly for the better part of the past year, I had yet to blog about it!
The advice I gave to Emily about baking for kids mostly revolved around sugar. Muffin recipes always have criminally high levels of sugar. The sugar industry does a terrifyingly good job at marketing to our children. Home-bakers are up against a tough foe when trying to compete with the sweetness of say, a PopTart, or Lucky Charms. (<<gag>>) So if you have a really picky eater, I can understand going with the given levels of sugar in a recipe but consider substituting (measure-for-measure) a sugar with a lower Glycemic Index. Coconut sugar (GI 35), maple syrup (GI 54), honey (GI 51) and agave (GI 15) are all better than regular sugar (GI 65) and much better than the dextrose sugar (GI 100) that is found in PopTarts. (A quick note that I would avoid using artificial sweeteners as there is evidence that they can increase your appetite, make you crave sweet foods more, and ultimately cause weight gain.)
Being a flour-less AND vegan muffin means these muffins are on the sweeter side. But if you can find anyone who has successfully baked a sweet treat made primarily of beans without using a significant amount of sugar, I'll eat my apron. And besides, with a picky eater who hardly ever eats protein, if I can get him to inhale half a can of beans then I'll take it. These muffins are so easy to whip up, and so easy to eat. Make a double batch if taking to a potluck or if you want to share with neighbors. They only make about 10 little muffins, and they'll be gone sooner than you can say "I bet you can't guess what they're made of!"
Lastly shout out and thank you to my longtime friend, Dr Kate, for sharing this recipe with me. Wish we could share these with a pot of tea.
Blender Pumpkin Pie Muffins
very slightly adapted from Chocolate Covered Katie
The recipe calls for honey but we prefer the version made with maple syrup. Use whichever you have to hand. Also, I have used red beans instead of white beans and they still tasted great! Lastly, having made them both ways, I'd recommend using a food processor instead of a blender unless you have an excellent blender.
1 15-oz can of white beans, drained and rinsed well
1/2 cup pumpkin puree
1/4 cup honey or maple syrup
1/4 cup almond butter
1/2 cup quick rolled oats
2 teaspoons vanilla extract
1/4 teaspoon salt
2 1/2 teaspoons pumpkin pie spice
1 teaspoon baking powder
If using a blender, blend the beans and pumpkin puree until thoroughly blended then blend in each ingredient long and well (the time will vary greatly depending on the quality of your blender.) If using a food processor, then dump everything into the food processor and process until very well blended, about three minutes, stopping halfway through to use a rubber spatula to scrap down the sides of the bowl. Spoon batter by 1/4 cupfuls into 12 greased muffin tins. Bake for 20 mins in a preheated 350 oven. The muffins will look underdone but they will firm up as they cool. Enjoy!
The advice I gave to Emily about baking for kids mostly revolved around sugar. Muffin recipes always have criminally high levels of sugar. The sugar industry does a terrifyingly good job at marketing to our children. Home-bakers are up against a tough foe when trying to compete with the sweetness of say, a PopTart, or Lucky Charms. (<<gag>>) So if you have a really picky eater, I can understand going with the given levels of sugar in a recipe but consider substituting (measure-for-measure) a sugar with a lower Glycemic Index. Coconut sugar (GI 35), maple syrup (GI 54), honey (GI 51) and agave (GI 15) are all better than regular sugar (GI 65) and much better than the dextrose sugar (GI 100) that is found in PopTarts. (A quick note that I would avoid using artificial sweeteners as there is evidence that they can increase your appetite, make you crave sweet foods more, and ultimately cause weight gain.)
Being a flour-less AND vegan muffin means these muffins are on the sweeter side. But if you can find anyone who has successfully baked a sweet treat made primarily of beans without using a significant amount of sugar, I'll eat my apron. And besides, with a picky eater who hardly ever eats protein, if I can get him to inhale half a can of beans then I'll take it. These muffins are so easy to whip up, and so easy to eat. Make a double batch if taking to a potluck or if you want to share with neighbors. They only make about 10 little muffins, and they'll be gone sooner than you can say "I bet you can't guess what they're made of!"
Lastly shout out and thank you to my longtime friend, Dr Kate, for sharing this recipe with me. Wish we could share these with a pot of tea.
| My little helper, this past fall |
| By the time I went to take a picture they were all eaten except one! These bake well in pretty muffin/brownie molds like this. |
| The batter may not be pretty but they sure are tasty! As you can see, the food processor works better. |
Blender Pumpkin Pie Muffins
very slightly adapted from Chocolate Covered Katie
The recipe calls for honey but we prefer the version made with maple syrup. Use whichever you have to hand. Also, I have used red beans instead of white beans and they still tasted great! Lastly, having made them both ways, I'd recommend using a food processor instead of a blender unless you have an excellent blender.
1 15-oz can of white beans, drained and rinsed well
1/2 cup pumpkin puree
1/4 cup honey or maple syrup
1/4 cup almond butter
1/2 cup quick rolled oats
2 teaspoons vanilla extract
1/4 teaspoon salt
2 1/2 teaspoons pumpkin pie spice
1 teaspoon baking powder
If using a blender, blend the beans and pumpkin puree until thoroughly blended then blend in each ingredient long and well (the time will vary greatly depending on the quality of your blender.) If using a food processor, then dump everything into the food processor and process until very well blended, about three minutes, stopping halfway through to use a rubber spatula to scrap down the sides of the bowl. Spoon batter by 1/4 cupfuls into 12 greased muffin tins. Bake for 20 mins in a preheated 350 oven. The muffins will look underdone but they will firm up as they cool. Enjoy!
Subscribe to:
Posts (Atom)